>> Administration :
Introduction
bulb provides an administration especially created to interact with Neo4j databases and to give us some other functionalities.
Setting up the administration
Bulb's administration isn't automatically set when you implement bulb into your project. But you can set it up with only 2 small steps :
1) Firstly, you'll have to define the administration's url via the BULB_ADMIN_BASEPATH_NAME settings' variable.
For example, if you define this variable on "my_admin", the administration will be accessible at www.mydomain.com/my_admin/
Per default, BULB_ADMIN_BASEPATH_NAME is defined on "admin".
2) Finally, go in the global urls.py file of your project, comment the line of the native Django's administration (if it isn't already done) and implement the bulb's one like this :
urls.py
# from django.contrib import admin
from django.urls import path, include
from django.conf import settings

urlpatterns = [
    # path('admin/', admin.site.urls),
    path(f"{settings.BULB_ADMIN_BASEPATH_NAME}/", include("bulb.contrib.admin.urls")),
]
Now you can access to the administration via the url that you've defined with BULB_ADMIN_BASEPATH_NAME settings' variable
Note that the administration may not have style, if you haven't followed the "Staticfiles" part of this documentation
Modularity
Natively, bulb's administration contains only the "Handling" part (see the Handling part of this documentation to learn more about it). Later, it'll also contain a "Statistic" part, a "Logs" part, and a "Bulb news" part.
But the administration is highly modular, you can add your own administrations' modules : for example a module especially designed to create and edit the articles of an on-line newspaper, for the editorial team.
Let's see how you can do this :
1) Firstly, be sure that the administration is correctly deployed, following the steps of the previous part.
2) Secondly, create a Django application for your new administration's module with the command python manage.py startapp <your app name>.
3) Thirdly, create a template in your new application, which will be the home of your new administration's module. This template must inherit of the administration's base template located in bulb/contrib/admin/templates/admin/background_pages/base.html. So you have to add this line at the head of your new template :
{% extends "administration/background_pages/base.html" %}
But you can find a generic template especially designed to create a template for a new administration's module at bulb/contrib/admin/templates/admin/background_pages/generic_template.html. It'll allow you to quickly inherit of the base template :
generic_template.html
{% extends "administration/background_pages/base.html" %}

{% block title %}{% endblock title %}

{% block head %}{% endblock head %}

{% block administration_part_name %}{% endblock administration_part_name %}

{% block content %}{% endblock content %}

{% block scripts %}{% endblock scripts %}
Then, fill each block of your new module's page :
- The title block defines the content of the
<title></title>page's tag.
- The head block defines the content of the
<head></head>page's tag.
Note that the header contains already these 3 lines per default :
<title>{% block title %}{% endblock title %}</title>
<meta charset="utf-8">
<meta name="viewport" content="width=device-width"/>
- The administration_part_name block defines the part of the administration's breadcrumbs trail related to the current page. Example inspired from https://grassemat.info :
{% block administration_part_name %}
    <i class="material-icons">keyboard_arrow_right</i>
    <a class="nav-link" href="{% url "editorial_home" %}">Rédaction</a>
{% endblock administration_part_name %}
(TODO LATER)> Note that to inherit of the bulb's administration's style, the link's class must be "nav-link".
Render when you're on the administration's home:

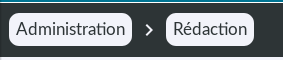
Render when you're on the home of your the new administration's module:
- The content defines the content of the
<body></body>page's tag.
- And finally, in the scripts block you'll have to put your
<script></script>tags.
Note that a loader script and a polyfill script are contained by default in the base template :
<script>
    const loader_box = document.querySelector("div#loader_box");

    // Support no javascript browsers.
    loader_box.style.display = "flex";

    window.addEventListener("load", function () {
        loader_box.style.animation = "fade 500ms forwards";
        window.scroll(0, 0)

    })
</script>

<script crossorigin="anonymous"src="https://polyfill.io/v3/polyfill.min.js?flags=gated&features=blissfuljs%2Cdefault%2Ces2015%2Ces2016%2Ces2017%2Ces5%2Ces6%2Ces7"></script>
Have a look to this full example inspired from https://grassemat.info :
editorial_home.html
{% extends "administration/background_pages/base.html" %}

{% block title %}Rédaction{% endblock title %}

{% block head %}
    {% if DEBUG %}
        {% compress css %}
            <link rel="stylesheet" type="text/x-scss" href="{% static "handling/css/style/node_class_home_page.scss" %}"/>
        {% endcompress %}

        <link href="https://fonts.googleapis.com/icon?family=Material+Icons" rel="stylesheet">


    {% elif not DEBUG %}
        <link rel="stylesheet" href="{% static_bundled_src "handling/bundle_node_class_home.css" %}"/>
        <link href="https://fonts.googleapis.com/icon?family=Material+Icons" rel="stylesheet">

{% endblock head %}

{% block administration_part_name %}
    <i class="material-icons">keyboard_arrow_right</i>
    <a class="nav-link" href="{% url "editorial_home" %}">Rédaction</a>
{% endblock administration_part_name %}

{% block content %}
    {% csrf_token %}

    <br/>
    <br/>
    <br/>

    <a id="create-instance-button" href="{% url "create_article" %}"><i class="material-icons">add</i></a>

    <table>
        <thead>
        <tr>
            {% for field_number, field_name in preview_fields_dict.items %}
                <th>{{ field_name }}</th>
            {% endfor %}
        </tr>
        </thead>

        <tbody>
        {% for uuid, properties in fifteen_last_instances_json.items %}
            <tr>
                {% for property_number, property_tuple in properties.items %}
                    <td {% if property_tuple.1 == True %}
                        class="true_td"
                    {% elif property_tuple.1 == False %}
                        class="false_td"
                    {% endif %}>
                        <a href="{% url "edit_article" node_uuid=uuid %}">
                            {{ property_tuple.1|truncatechars:40 }}
                        </a>
                    </td>
                {% endfor %}
            </tr>
        {% endfor %}
        </tbody>
    </table>

{% endblock content %}

{% block scripts %}
    <script src="bundle.js"></script>
{% endblock scripts %}
4) Then, create a view in the views.py file of your new administration's module. The view must render the previous template.
Example inspired from https://grassemat.info :
views.py
@staff_only()
@login_required(login_page_url=login_page_url)
def editorial_home_view(request):
    if request.user.has_perm("view_article") or request.user.has_perm("view"):

        (...)

        return render(request, "editorial/pages/editorial_home.html", locals())
5) After, you'll have to fill the urls.py of your new administration's module, to create an url that will render the home page of this module.
urls.py
from editorial.views import editorial_home_view
from django.urls import path, re_path

urlpatterns = [
    path("", editorial_home_view, name="editorial_home")
]
6) Finally, you have to fill the settings' variable BULB_ADDITIONAL_ADMIN_MODULES with this syntax :
settings.py
BULB_ADDITIONAL_ADMIN_MODULES = {
                                    "<application 1 name>": {
                                        "printed_name": "xxx",
                                        "path_name": "xxx",
                                        "home_view_url_name": "xxx"},

                                    "<application 2 name>": {
                                        "printed_name": "xxx",
                                        "path_name": "xxx",
                                        "home_view_url_name": "xxx"},

                                    "<application 3 name>": {
                                        "printed_name": "xxx",
                                        "path_name": "xxx",
                                        "home_view_url_name": "xxx"},

                                    (etc...)
                                }
Example inspired from https://grassemat.info
settings.py
BULB_ADDITIONAL_ADMIN_MODULES = {
                                    "editorial": {
                                        "printed_name": "Rédaction",
                                        "path_name": "redaction",
                                        "home_view_url_name": "editorial_home",
                                    },
                                }
7) Now, for each new page of your administration's module, you'll have to follow the previous steps (except the 6th step).